Showing posts with label revamp. Show all posts

Tuesday, September 24, 2013

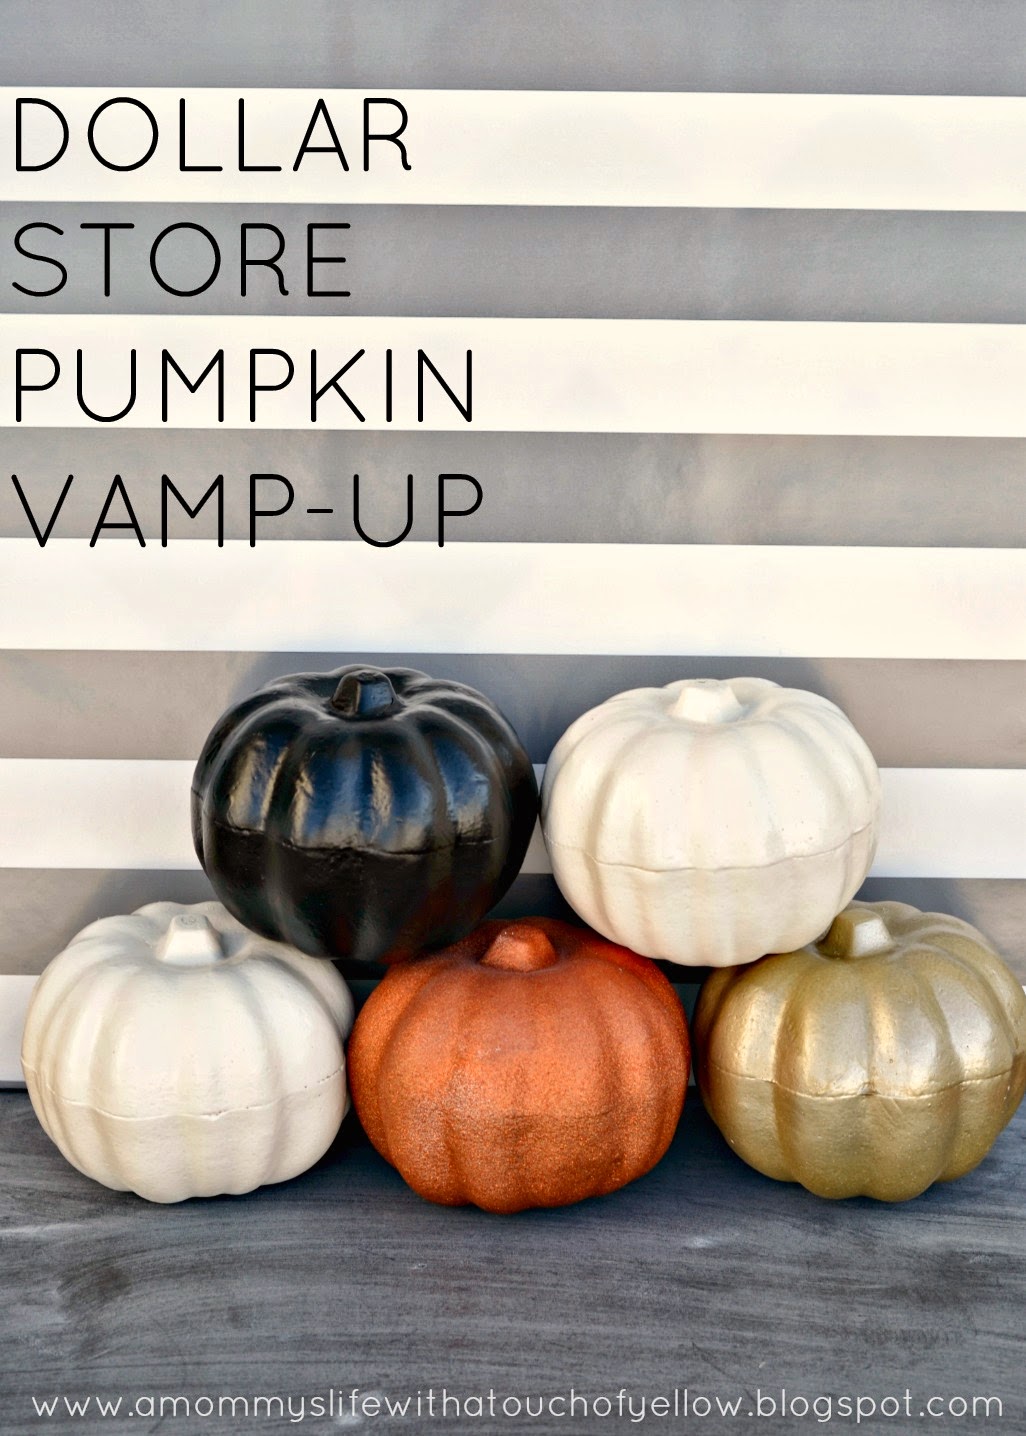
$1 STORE PUMPKIN VAMP-UP! {Tutorial}


First Halloween post of the year!!! Wahoo! I am a little behind on the Halloween posts and tutorials due to life being Cray cray right now, but I have a lot of goodies coming up {including this baby} so I promise it will be worth it. I am so excited to be getting my craft and decorating on for this Holiday, because oh I don't know? It is like my favorite month and Holiday or something. My birthday is in October so Halloween has been my favorite since I was tiny, I just always put them together as one big celebration.

 I am going to start off the Halloween project posts with a super easy one, but one of my favorites because I love the transformation and some of those darn fake pumpkins can be expensive {at least for me these seem like it}. Lets start off with what you will need and go from there onto the easy tutorial.

{Supplies I used}

-A ugly cheap looking pumpkin from Dollar Tree {don't worry we are going to make it look fab in just a few moments} I got five and might get one more. Might as well when they are only $1 compared to $5-$15
-Primer {you know I love me some Zinsser Bullseye 123 primer from lowes}
-Spray paint of any color you are wanting {I just used what was already in my stash {Free}


{What I did}

It is as easy as two steps....
1. Prime your pumpkin. This is to help cover up that orange and will give it a nice surface for the spray paint to adhere to.


2. Once the primer is dry go ahead and spray paint those babies. I used a few different colors that I was loving for Halloween and fall time, you could use whatever goes with your style and decor. The glitter pumpkin was just as easy because I used the color blast spray paint that has the color and glitter in one {no extra steps required}. When I painted them I turned them upside down and sprayed them that way first then once that was dry I sprayed the top. This helped to get all the crevices, nooks and cranies covered so you would have no idea it was a dollar store pumpkin. Let them dry completely and put them up with your decor.


Can you believe those are the same pumpkins? Don't they look great?! I love the transformation and can't wait to get them up for display. I also love the gold and white ones to keep up for thanksgiving.


The best part is that they only cost me $5 to make all 5, everything else I had on hand. Use what you have and use your coupons at your local craft stores and you will be amazed the money you can save while still having beautiful decor. And no one will even know that you go them at the dollar store unless you want to brag and tell them how you transformed them, then they will be amazed.

Linked up HERE
 
Now go, run to the dollar store because these puppies go FAST!!!!
Happy crafting. 
 

And while you are in a Halloween crafting mood....don't forget to check out 
my Halloween project round up of my past projects while you wait oh so patiently for my new ones. 


Last but not least. Go and sign up to go to the Pinners Expo in October!
If you use the code "mommyslife13" you will get a 25% discount!!!
You will love this expo full of classes, vendors, shopping and so much more
I will be teaching a class on painting/refinishing furniture and would love to see you
And while you are signing up might as well enter to win this awesome giveaway of an ipad mini

 Don't forget to follow me on Instagram 
@WHITNEYULRICH
to see all my fun pics, fashion ideas
 and sneak peaks of what I've been working on
I would love to follow back 
don't be shy  
Be sure to follow me on INSTAGRAM
SIMPLYSADIEJANE
to see all my fun photo.
Pin away my loves
- See more at: http://www.simplysadiejane.com/search?updated-max=2013-07-09T13:40:00-07:00&max-results=7&start=14&by-date=false#sthash.WsGqMQyq.dpuf
 
Be sure to follow me on INSTAGRAM
SIMPLYSADIEJANE
to see all my fun photo.
Pin away my loves
- See more at: http://www.simplysadiejane.com/search?updated-max=2013-07-09T13:40:00-07:00&max-results=7&start=14&by-date=false#sthash.WsGqMQyq.dpuf
Thank you for your support, for reading and for following
Make sure to check out my other social media sites and follow along
{Links below}

Twitter Subscribe Pinterest Facebook Etsy Shop Follow on Bloglovin Instagram Contact Me

Tuesday, August 13, 2013

Sofa Table Revamp {tutorial}


If you saw this post or have been following me on Instagram {you should if you don't} you know that I have been wanting to make my old sofa table pretty for quite sometime. I got this table about 3 years ago at the DI {a thrift store here in Utah} for only $10 and it has been needing some love since then. I knew it had good bones when I saw it I just couldn't decide what color to do and I put it off for forever. At the beginning of July we move and as I was looking at my open rooms downstairs that table just drove me crazy not being up to date so last week I finally took the plunge got some Yellow paint and got to work.
 
{Supplies I Used}

-Sofa table {DI $10}
-Power Sander {named Gus Gus}
-Yellow Paint {Valspar samples from Lowes}
-Primer {Zinsser Bulls Eye 123 from Lowes}
-Paint tin
-Paint brush {2}
-Paint roller {foam roller-size small}
-Rags {3 or 4}
-Stain {Early American}
-Finish Spray {Minwax Polycrylic clear Satin}

{What I did}

Here is what she looked like before just a regular,old, boring, scratched up, light oak sofa table. Nothing too special. Well that's what you may think, but I was in love as soon as I saw it. I loved the rope detail and the curvy legs. It was perfect and the price tag was even better. I knew I was going to like this makeover.


Lets get started, first you are going to grab Gus Gus, or in other words your power sander. Yes I like to name my tools. Makes me feel like our time spent together in the garage is more fun and not as lonely. baha! Sand the table, removing the top coat finish and smoothing out the scratches. There were a lot of scratches, I sanded down most of them but I left some for character and a shabby chic look.


Once she is all stripped and sanded down you are going to clean it all up with a wet rag followed by a dry rag removing all the dust and debris.


Next up is the priming. I can not stress enough how important the priming step really is. Do not skip this step. The primer gets the wood surface ready for the paint and helps the paint to stick along with giving it the best vibrant color and coverage. Also get the Zinsser Bulls Eye 123 primer it is the very best out there. It goes on much smoother and better coverage than the killz. Take my word for it you want this stuff. You can find it at Lowes home improvement. It also dries soooo fast which is nice to getting your project done faster.


Then its the fun part. Painting. Where you really see the transformation. I rolled this table because I could not find the perfect color yellow I was going for in a spray paint. I got a couple cans of the valspar samples from Lowe's and got to work. First I took my paint brush and brushed in the creases and areas that the roller wouldn't be able to reach. Then I rolled the paint on going in nice smooth patterns over lapping so there were no paint lines. I did two coats and that was plenty of coverage. Then I let that dry completely. Isn't the yellow so pretty.


I loved it already but with all the detail I really wanted it to pop so I got out my stain and distressed it up a little really quick. This is such a quick and easy process. I don't like to do this to ever piece of furniture, because I think there is such thing as over glazing things but I like to do it every once and a while and when it is next to pieces that are clean crisp painted pieces.


You are going to work in smaller sections so it doesn't dry too quickly before you can wipe it away. You are going to brush it on making sure to get it into all the detailed crevices. Let is sit for about 30 second to a minute to let it really seep into those detailed sections, but don't let it sit too long that is dries all the way. Then you are going to take a clean rag and you will wipe away the excess stain just leaving i t in the details and a little distressed background on the flat pieces. Then you will move onto the next small section until the whole table is complete. Then again you are going to let it dry for at least a couple hours.


Do you see how it really shadows and makes for perfect details pop out. Love that stain with the yellow.


Once it is dry, I sprayed a coat of the polycrylic finish on the whole table. Let is dry for 2 hours and then it was beautiful, transformed and ready to bring back into the house.


Bringing the table back into the house finally got me to take down my 4th of July decor and put up some fresh, crisp decor for the rest of the summer months.


Linked up HERE


Don't forget to pin pin pin my loves!

See that one of a kind pallet art made from scratch?
Yeah a post all about where I got the plans and an awesome ebook to tell you all about coming soon
You don't want to miss this one. :)
Until then check out some more of my painted transformations

 Ikea table transformation

 Yellow Nightstands

 Ikea side table/stool transformation

Thank you for your support, for reading and following
Make sure to follow along on my other social media sites 
I would love to follow back {Links below}

Twitter Subscribe Pinterest Facebook Etsy Shop Follow on Bloglovin Instagram Contact Me

LinkWithin

Related Posts Plugin for WordPress, Blogger...
Pin It button on image hover