Showing posts with label tutorials. Show all posts

Monday, February 3, 2014

Bring on the PINK Valentine Decor {Tutorials and Ideas}


I love to decorate for Valentines Day. It used to be a holiday I would skip when it came to decor, but I will take any excuse to add some pink into this home filled with boys every once and a while. Really though I am loving all the pink, girliness and femininity of the decor this month. And well, the boys can just deal with it one month out of the year right?! So I just thought I would share how I decorated my home this month with some links to some tutorials or shops.


Sometimes you just need pretty and simple. For my kitchen table it is pretty small so I don't like a lot of clutter. I simply used a white table runner and placed a vase in the middle. I have these little snow balls left over from Christmas that I believe I got at Tai Pan and the hearts are cut off from heart picks from the dollar store. Then I simply added a little red ribbon. So simply but so pretty,


For my faux mantel I used my favorite backdrop that I made a couple years ago, you can find the tutorial HERE. I love it because I can use it for holidays but also year round since my kitchen is red. I got the globe from a Cricut event, the pink vase is just a spray painted soda bottle, the little glass containers are from the dollar store and the target dollar spot and I just filled them with valentine candy.  The candle sticks are from Ikea and I made the Rosette balls from THIS tutorial from House of Smiths. Then I spelled out Valentine with Scrabble letters and finished it off with a super simple garland. The garland is just twine with pine cones and dollar store snowflakes strung on.


My sofa table is always a fun place to decorate and I like to use larger decor items to fill up the space and give it some depth. The Love wood letters are from the Wood connection and you can find my tutorial of how I made them HERE. The little I heart U vases are from the dollar spot at Target and I filled them with dollar store heart picks. Then the rest are printables I found HERE, HERE and HERE. I used frames I already had and spray painted the pink and white ones.


I have a really fun small and tall red table next to my sofa table I simply added my adorable and Favorite owl from Michaels and a milk glass vase from the DI with some babies breath inside. And it is always fun to decorate the Chalkboard for whatever holiday or event is coming up.


This adorable Be Mine bunting was made by my mom over at Organize and Decorate Everything and she gave it to me. I love it and always find the perfect place for it no matter where we are living at the time.


I put this pillow out every year. I love the pink on my couch mostly, and the beaded letters are so much fun. I have had this pillow since I was in High school. My mom gave it to me one year for valentines day and it has seen many dorms and homes since.
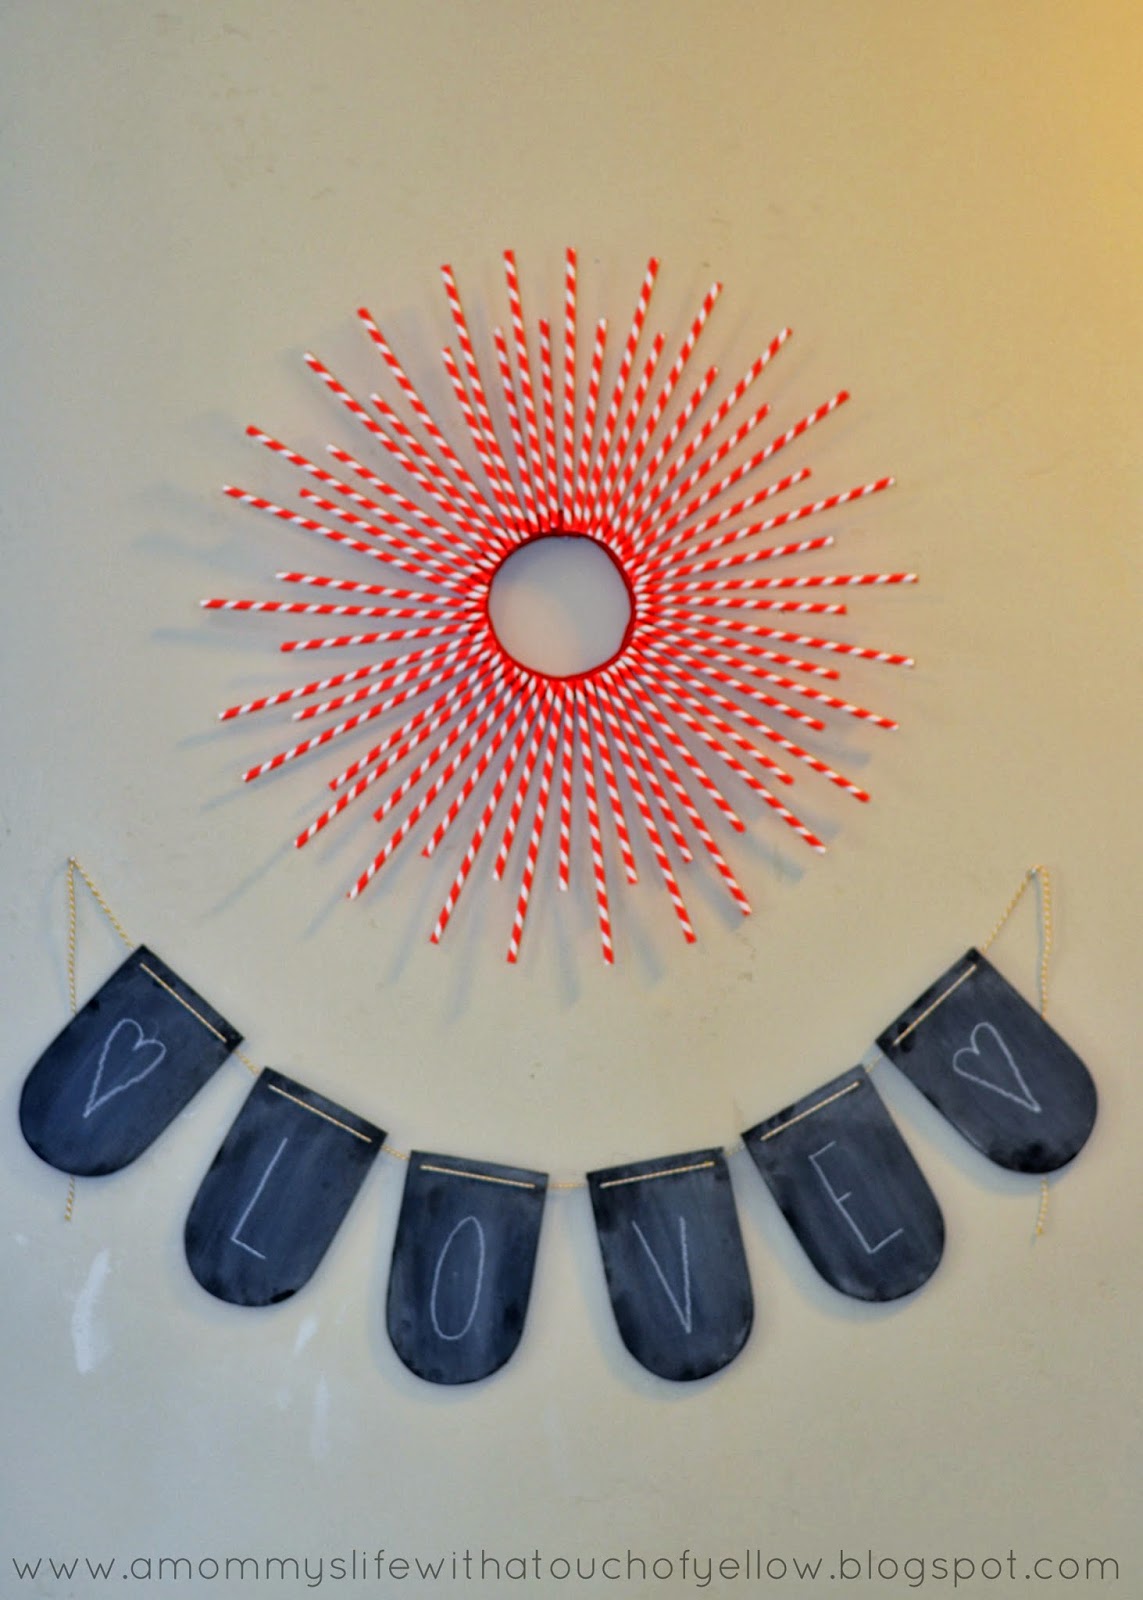

You can find my straw wreath tutorial HERE. I use this for many occasions and holidays, I love how versatile these wreaths can be. The tutorial for the chalkboard banner is found HERE.

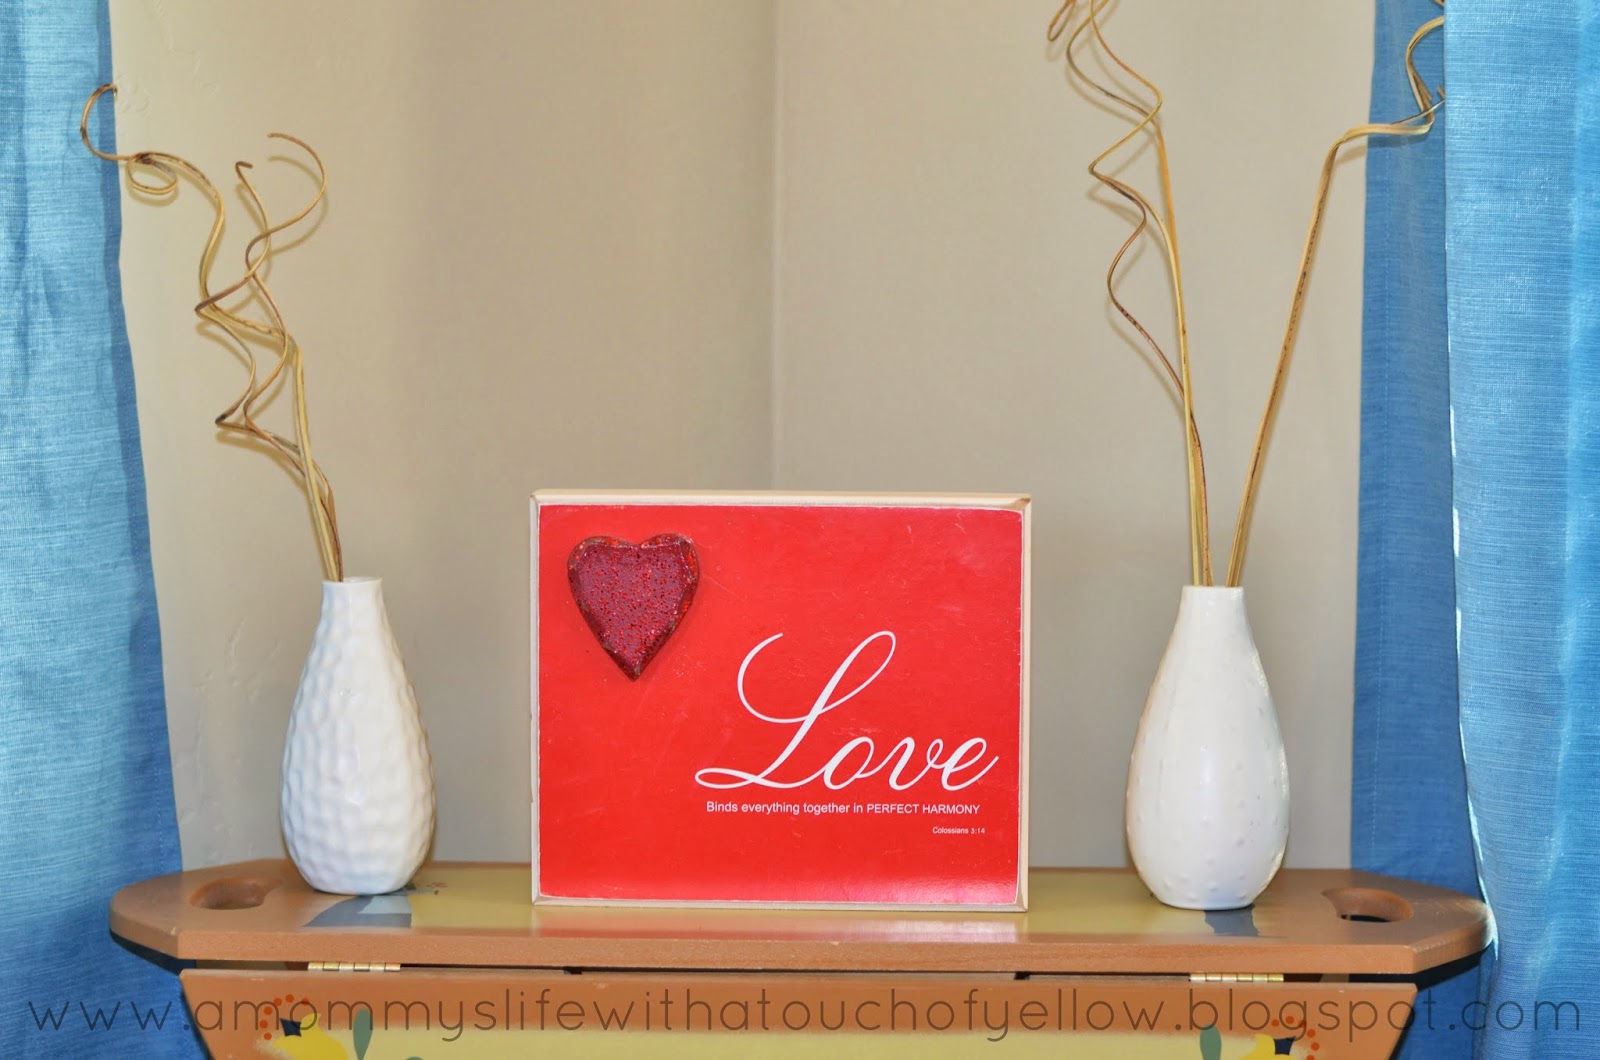

Love sign from Michaels, and white vases from ikea filled with some twigs from michaels.


I love this little pop of Valentine Love and color in the little guest bathroom in out main living area. The tutorial for the Feather wreath is HERE. For the frame, I simply wrote out All you need is...is all you need on my computer, printed it out, and then stuck on the glitter love with some sticky dots on the glass of the frame. I got the LOVE from the target dollar spot.


My antique windows are my very favorite I LOVE them. I simply added some washi tape bunting to dress them up from this month. Tutorial HERE.


Upstairs in the hall way I have these fun little shelves that are great to get a little bit of the holiday spirit up there too. I got the Heart print HERE and just put it in a spray painted pink frame I got from the dollar store. Added and Ikea frame, an antique wood molding piece, and a little glass birdie from Michaels. On the left I have a picture of me and the hubby, another love bird, and a bird cage with some heart picks inside. On the right side I put a picture up of my other two little valentines, a spray painted pink soda bottle and a fun chicken wire frame for texture.


Phew! Did you catch all that! Fun right?! Just pick a few ideas that you love
and bring them into your home and your style. 
I hope you were able to be inspired by some of my ideas 
PIN PIN PIN away for future years to come and holiday craft nights 
Happy Weekend, Happy LOVE Month, Happy Monday
and smile lets get this week off to the right start shall we?!
Oh and please come back for some more great posts this week.

I would love to have you follow me on Instagram
@WHITNEYULRICH
to see all my fun pics, my real life, fitness, fashion ideas
and sneak peaks of what I've been working on

Thank you for your support, for reading and for following
It really means the world to me 
Make sure to check out my other social media sites and follow along
 {links below}
Twitter Subscribe Pinterest Facebook Etsy Shop Follow on Bloglovin

Monday, January 20, 2014

Valentine's Day Round up

 Not only is it a new year, but Valentines day is quickly approaching. It is crazy how fast time really does fly by the older you get. I am not sure I like it so much. So with Valentines coming up I wanted to share with you some of my top crafts, DI projects and decor ideas so you can get to creating and decorating. I didn't used to decorate much for Valentines day, but after the last few years it has become one of my favorite. It is the one time of year I can have pink in my home of all boys. I'll take it where I can get it. I can't wait to get all the love up in my home. Check them out, each link will take you to the tutorial for that project.


Happy Monday!
Happy creating 

I would love to have you follow me on Instagram
@WHITNEYULRICH
to see all my fun pics, my real life, fitness, fashion ideas
and sneak peaks of what I've been working on

Thank you for your support, for reading and for following
It really means the world to me 
Make sure to check out my other social media sites and follow along
 {links below}
Twitter Subscribe Pinterest Facebook Etsy Shop Follow on Bloglovin

Friday, November 15, 2013

Clean and Simple Thanksgiving Decor 2013 {Tutorials and Ideas}


Like I have said many times I love to decorate for the Holidays. And although Christmas creeps up on us earlier and earlier every year. When the Halloween decor comes down Christmas doesn't go up quite yet in this house there is that middle holiday, you know the one we call Thanksgiving. Don't get me wrong I love Christmas and I especially love to bring out all the Christmas cheer but after thanksgiving that is.  I actually like to decorate for thanksgiving because it is calm, neutral colors and it just feels so fresh and clean bringing in a perfect amount of fall inside. I love this style in between the playful, childlike Halloween decor and the glits and glam, glitter and sparkles of the Christmas decor. 

Today I just wanted to show you how I put together some easy, and thrifty decor pieces and displays for my family and guests to enjoy this year. I like to incorporate a little of what I am thankful for in this decor because well that is what this time of year is all about so pictures of my family are a huge part. Pick up a few of these ideas and you will love the simplicity yet festive look it will bring.

First up is this fun sofa table decor! In love with this and it was all what I already had or made for super cheap. I wanted it simple but to speak volumes. I love it! You can find the ridiculously easy wheat banner tutorial HERE and the Dollar store pumpkins makeover HERE.  I made both the wheat banner and pumpkins to be able to use them for Halloween and keep them up for November. As for the rest..
-The Eat letters I made for my all year round kitchen decor, but of course EAT is perfect for thanksgiving. You can find the Tutorial HERE. 
-The amazing pallet piece is  handmade by yours truly {and I mean all by myself while hubby was out of town} using the plans from The handmade home ebook. I will be posting more about the projects I have made from this awesome book very soon, so stay tuned. You will die.

 
 -the candle sticks are from Ikea and I have had them forever, but they still have them and they are only a couple bucks over by all their candles.


-The big turkey is my very favorite to put out every November, we got it from a very close family friend from a Holiday shower I had for my wedding!


-Then lastly I simply added some of our most recent family pictures in some Ikea frames, because well I am sure as heck a lot thankful for that adorable little family of mine. I mean come on look at my boys! I die. There is just something about being a mom to boys and being treated like a princess from not only my husband but them as well. I am so spoiled. 


Next up my kitchen table display just consists of some DIY hand painted Mason jars Just like I did HERE, just fall color version. I also had these up for Halloween. Added a fun handmade table runner we got for our wedding, and some a mini white pumpkins and you are set. Easy peasy.


Like I said in my Halloween post this is what I like to call my "wannabe mantel" since I don't have one. Although I am working my DIY magic and will be building one for our rental very soon. So lets just pretend this is a mantel for a minute ok, humor me.


-I got the hay barrel for super cheap on sale at hobby lobby 
-White antique molding- A perfect little antique shop in Cedar City, Utah {I need to go back there they have the best treasures}
-Keep Calm and carry on sign tutorial found HERE
-Prints from HERE and HERE in some 99 cent Ikea frames 
-Mini pumpkins from a pumpkin patch left over from my Halloween decor
-Awesome long legged turkey from Ty's Grandma's old decor {treasure I tell ya}


 -The turkey banner was super duper easy. I had these letter cards I have had forever from Michaels and I simply just hot glued them to some burlap ribbon. Done and oh so cute!

  
-This chalkboard I keep up year round. It is from Hobby lobby and I just painted the wood trim red. Wrote Giving thanks and drew a little turkey on it. Nothing fancy just simple and fun. 
-Pumpkin from JoAnnes
-Adorable little turkey hand art plaque was made by my little Maddux last year and it is my favorite. Oh my gosh look at that adorable little hand. I die! He made it at a fun event at Poppyseed projects. 
Maddux was so excited to see it up this year. I think it is so important to bring your kids projects into your decor. Plus I am so thankful for him and his adorable little hands. 

-Super fun and festive Holiday countdown made from a Ikea metal trivet and paper leaves. Full tutorial found HERE.

I obviously like banners. Why not they are fun, easy to make and oh so festive. This banner was made by my oh so talented mom over at Organize and Decorate everything and she gave it to me.


I love it I just added the leaves to made to some backers twine with some tape.  You can find her tutorial HERE. Thanks MOM!!!


-Harvest sign- Won it at bunko when I was subbing years ago I think it is from Roberts Crafts {which sadly is no longer}
-Mini pumkins
-Adorable little banner- I made this cute thing at a fun event called Ignite that my cute friend Kami, from the Blog Sweet Charlie put together and this was one of our craft projects we did. They were precute mini wood triangle with holes in them to string twine through. I just simply mod podged some orange, a little blue, and black and white card stock onto the triangles and sanded down the edges for a perfect fit.  I also did Christmas card stock on the back to I could have two banners in one.


- Cute little card cute from a 12X12 scrapbook paper from Heartland Paper  just tucked into this adorable chicken wire frame from pick your plum 


Dollar store pumpkins makeover HERE, and a frame printable found HERE, displayed on my favorite antique table. My goodness I love this table my parents have had it forever and it was in my room when I was a teen I don't know why but it has been one of my favorite pieces and my mom gave it to me to put in my home when I got married.


-Antlers- Thank you Restless Risa {I have some fun plans for these for the upcoming holidays}
-Dish- Wedding gift 


-Pumpkin I have had forever I think it was from Roberts Crafts my first fall married.
-Pumpkin made from a drier vent I made clear back in my young women days.  Can you believe I still have it. Just get your drier vent cut it, bent it into a circle, hot glue it together, spray paint in orange and add a stick at the top. Done!


Loving my family gallery wall especially because I am so so grateful for my family. I added some new family pictures up there mixing them in with some old ones and I love them!!!

 
-Every Holiday HAS to have a themed wreath right...or do I just think that. You can find my tutorial for this beauty HERE. Also the fun Chalkboard Decal is found HERE.
-Corn Stalks bought at the pumpkin patch only $1 a piece 
-Crates- Smith and Edwards filled with Hay and pumpkins


-DIY side table tutorial HERE
-Apple picking bucket- Homegoods filled with burlap and apples\
-I also have a big Caravanshoppe engineering print getting printed at Staples that I will be putting up in that blank space above the crates as soon as I go pick it up  

Phew! Did you catch all that! Fun right?! Just pick a few ideas that you love
and bring them into your home and your style. 
I hope you were able to be inspired by some of my ideas 
PIN PIN PIN away for future years to come and holiday craft nights 
Happy Weekend, Happy Thankful Season, Happy Holiday Season
and smile it is Friday Love you all

 Don't forget to follow me on Instagram
@WHITNEYULRICH
to see all my fun pics, my real life, fitness, fashion ideas
and sneak peaks of what I've been working on

Thank you for your support, for reading and for following
Make sure to check out my other social media sites and follow along
{Links below}

Twitter Subscribe Pinterest Facebook Etsy Shop Follow on Bloglovin Instagram Contact Me

LinkWithin

Related Posts Plugin for WordPress, Blogger...
Pin It button on image hover