Showing posts with label vinyl. Show all posts

Friday, August 23, 2013

Front Door Greeting {with Chalkboard Vinyl}


I am slowly but surely working on bringing my new home together. I still have a ways to go but it has been fun to find a place for everything and create new items to put in this beautiful home that I never want to leave. {too bad we are just renting it}. I knew I wanted to make my front porch welcoming, kind and friendly to our new neighbors around us. I change out the wreath each season and holiday, but I wanted to do something else on the door. I thought about the tradition vinyl welcome sign but then quickly came to the realization that I wanted something a little different and unique. I found some chalkboard vinyl I have had in my craft stash for quite a while now I just didn't have the perfect project for it yet, that is until I thought of this simple, but really fun decal for my front door. It was so quick and easy, literally half of a nap time craft :)

{Supplies I used}
-Chalkboard vinyl {mine is Cricut brand}
-transfer tape {not require but it does make it easier to get everything straight and is a quicker application process-the cricut chalkboard vinyl came with the transfer tape}
-Cricut mini {again this is not require you could easily do this without a cutting machine it is just quicker}
-Marker and scissors {if you don't have a cutting machine or a way to borrow one}
-Applicator tool {or really you could just use a credit card}
-Chalk
-Rag 
{What I did}

The first thing I did is hook up my cricut mini and chose my designs that I wanted to use:

 Main label- label 1-5 11 1/2 inches 
Triangle banner- banner 2 each triangle is 1 inch total of 71/2 inches 
Arrow- Arrow 8 inches 
heart- heart-5  1.5 inches 

Then once I had it all picked out, designed and sized, I cut it out on some scrap paper to make sure everything was size correctly, then I cut it again this time on the chalkboard vinyl. 

***If you do not have a cutting machine you can design it your self or find designs online to print out and trace onto the vinyl then you are going to cut out your designs with scissors. 


The machine will cut the vinyl and leave the back uncut. This is nice for the transfer tape. Once it is cut you are going to peel off the excess vinyl as shown above. 

Next you will take your transfer tape and measure it to the size of your decal backing, then peel the tape off its backing, put the sticky side onto the chalkboard vinyl and use your applicator or credit card to smooth it on. So it looks like the last picture above. 


Peel the backing off and the chalkboard vinyl will stay on the tape then you will place it onto the door right where you want it, use your applicator and rub it around to make sure it is sticking onto the door and then peel the tape away and all you are left with is the chalkboard decal! tada!

Next you will take some chalk and rub it over the entire thing, then use your rag to wipe the chalk off. Then your surface is ready for coloring, writing, or picture drawing. Use your creativity. This is a great tip for all new chalkboard surfaces so that it doesn't leave a ghost {previous writing} on it. 


Didn't it turn out so cute?! I Love how it is unique and different than any of my neighbors doors. I also love that it is not permanent and it is great for both renter and home owners alike.


For now I just colored in the banner and arrow with some yellow and Wrote Welcome in the label. It will be fun to change this out for the season, holiday or whatever is going on in the area or our family at the time. 


 Current front porch. I have some really fun ideas coming up to
spruce it up a bit so make sure to stay tuned


 Side table Tutorial 
 White planter // Ikea
Glass Milk Bottle //Ikea
Blue mason jar // Smiths

 Outdoor Door Mat Makeover tutorial 

For those who have asked here is a picture of the front of the house. Isn't it cute?! I die and i really want to buy it one day if we could, or at least build a replicate. I love the inside floor plan just as much as the outside. 
 
Happy Crafting! And don't forget to PIN IT!
 As always if you have any questions please feel free to email me any time 
@wjwiki07@hotmail.com I would love to hear from you.
Linked up HERE
Thank you for your support, for reading and for following
Make sure to check out my other social media sites below and follow along
{Links below}
Twitter Subscribe Pinterest Facebook Etsy Shop Follow on Bloglovin Instagram Contact Me

Tuesday, May 21, 2013

Elephant Tribal Tee {Tutorial}


I was so excited when Provo Craft sent me some heat transfer vinyl to try out for a competition I was in. I got to be apart of Blog Wars. It was really fun, but I wish I could have stayed on longer. I kinda feel lame not making it very far but oh well. I LOVED my project I made either way. So I was excited for this product because I have actually had a roll of it on my shelf in my craft closet for about a year and have just been nervous to try it out so this got me to just bite the bullet and do it and the end result was better than I even planned. Don't you love when that happens?! I have been loving the tribal animal print, bold, aztec, and geometric styles in fashion lately so I thought why not make my own so I just rolled with the idea and this is what I came up with. Fun right?! It is pretty bold but so fun. I am not scared to get a little crazy with my fashion.

{Supplies I used}

-White T-shirt {Target $12 and it has a really cute zipper in the back. It is just like this one only white}
-1 sheet of Black Glitter Heat transfer vinyl {provided to me by Provo craft}
-Pre cut triangles in pink glitter and flat blue heat transfer vinyl {also provided to me by Provo Craft}
-Cricut machine {or scissors}
-Iron 
-Scrap piece of cloth
-Scrap piece of paper 


{What I did}

The first things I did what get on my cricut craft room and found the perfect cute little elephant. If you don't have a cutting machine you could borrow one {come use mine, if you live in Utah I totally would let you} or just find an image online, print it out and cut it to use as your template. Then I cut a whole bunch of them just on some scrap paper. I did this to make sure it was the right size  and how I wanted it to be laid out before I cut it on the vinyl. 


Then the scary part I cut out he vinyl. I actually had a little hiccup during this step like I knew I would but it ended up being even better in the end. So you want to make sure you do a mirror image of your elephant and you want the shiny side facing down on your cutting mat. I did this great on my first sheet and then my second sheet I was distracted {plus can I just tell you since I have had kids my brain is not all there} and I did the mirror image but I cut it with the shinny side up so the elephants were all supposed to be going the same way like I had laid out with the blue elephants and instead half were facing one way and the other half the other way. After a small freak out moment  I contained myself and had a better idea!


Isn't he cute?! I mean come on who doesn't want a shirt with this cute little guy on it?


So once they were all cut out I laid them out on the shirt just how I wanted it to look. 


Now comes all the ironing. First you are going to heat up the fabric that you are going to place your image on. Because they were so small I did two elephants at a time. So I removed two, put the iron on the fabric were they would be placed for about 20 seconds.


Then you are going to put your images right where you want them on the already heated fabric spot. 


Put a scratch piece of fabric on top of the image and put the iron on top of that fabric holding it there with medium pressure for about 30 seconds. Then you will move on down the line and repeat the following steps: remove elephants, heat fabric, put elephants in place, put scratch piece of fabric on top and iron for 30 seconds. over and over until you have done it to all your images elephants and the triangles down the middle. 


Once they are all ironed on you are going to flip over your shirt and go down the line of elephants holding the iron on each set for another 30 seconds this just helps really seal them in place. 


And now that all your ironing is done you are going to let it cool completely and the last step is to take of the shiny film from the vinyl so all you have left is the pretty images.  If for some reason any of the images are lifted or did not stick just simply replace the film, put the scratch piece of fabric on top and iron it on again for another 30 seconds making sure to get all the edges and then it should be good!


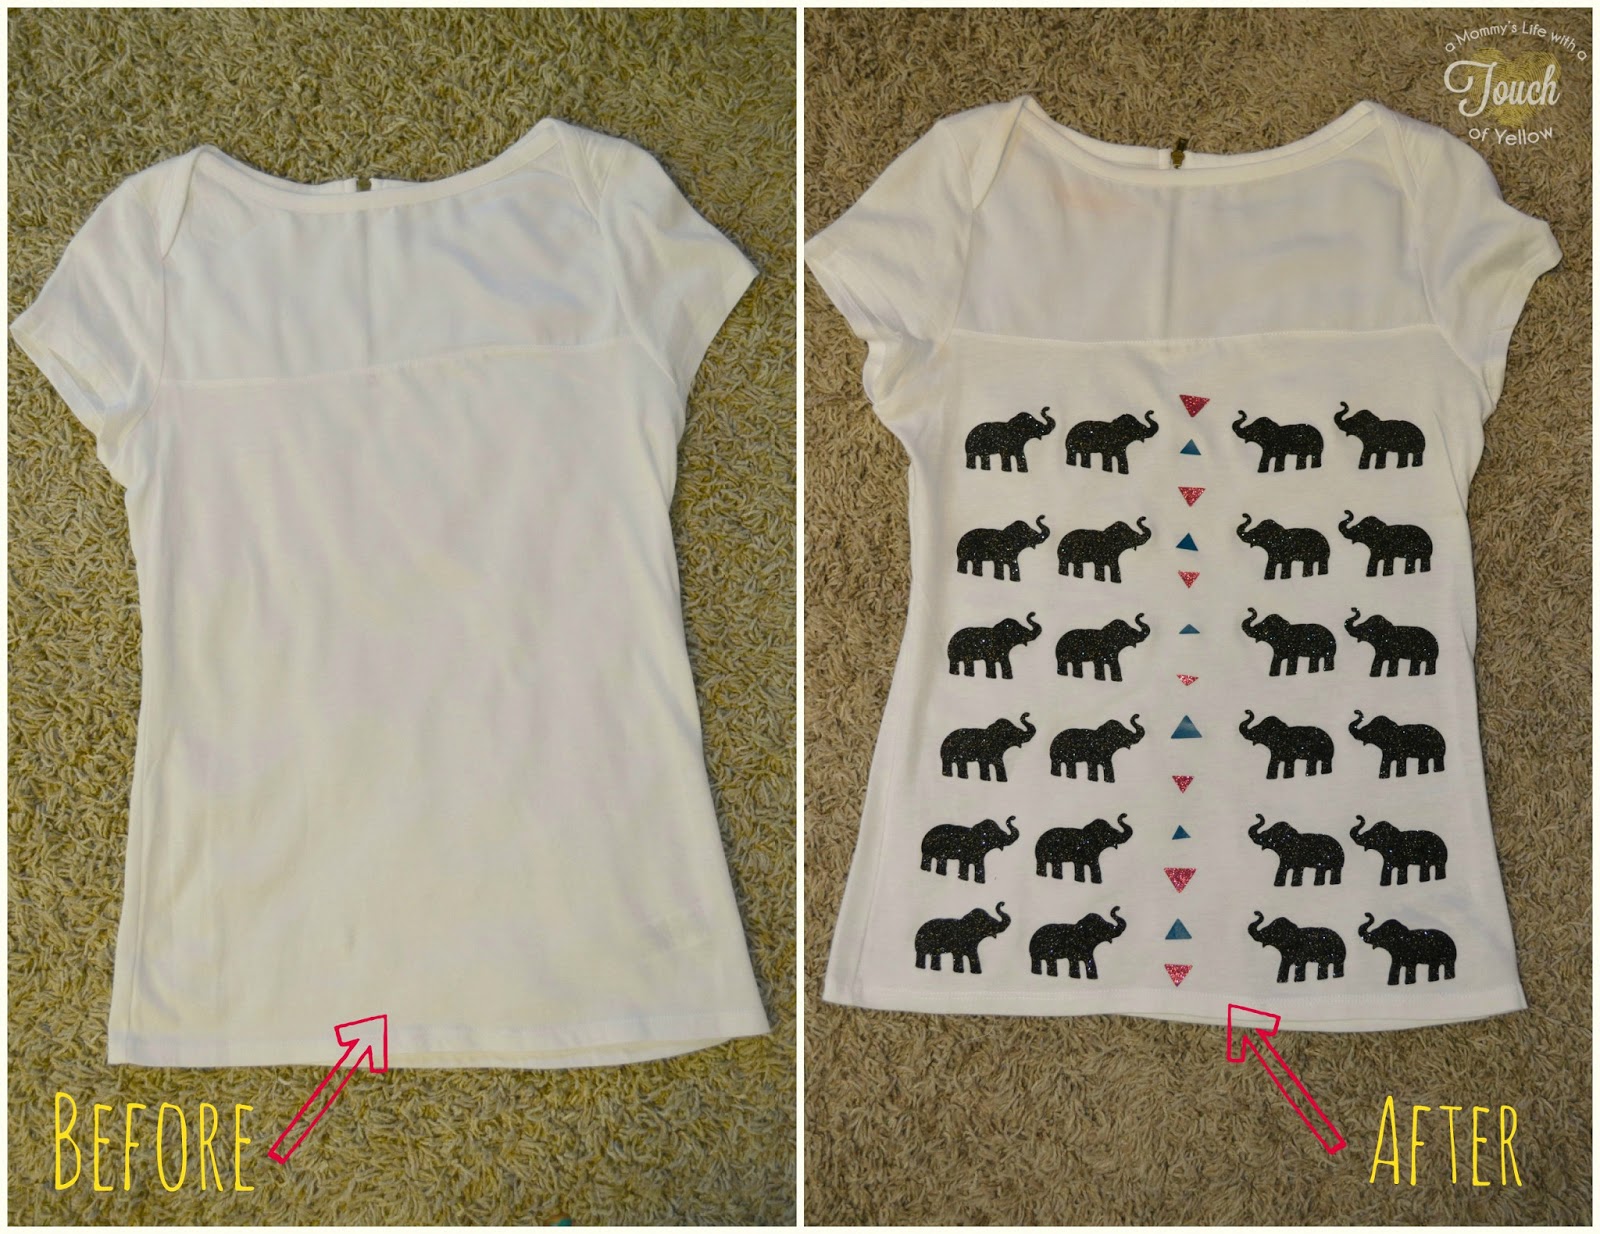
Simple as that you are done. Look at that awesome before and after.


It is so fun to make your very own personalized Tee. I have gotten so many compliments on it when I wear it and people asking me where I got it. I love seeing their reaction when I tell them I made it. And the best part is  you can too! It is so easy and the possibilities are endless. You can get creative and show your personality and your own style.


Have you entered the Albion Fit swimsuit giveaway going on on my blog right now?
If not get your cute little patootie on over to THIS LINK and enter!
You do not want to miss the opportunity.
It is an amazing swimsuit, an amazing company and I am
also giving away $20 to their store that you can spend on whatever you are lovin 

Thank you for your support, for reading and for following
Make sure to check out my other social media sites below
 I would love to follow back
{Links below}
Twitter Subscribe Pinterest Facebook Etsy Shop Follow on Bloglovin Instagram Contact Me

LinkWithin

Related Posts Plugin for WordPress, Blogger...
Pin It button on image hover