

This weekend I am at Snap Conference! I am so excited! You can follow along my adventure by following me on instagram. But I am not gonna leave you hangin just because I am out of town for a bit. No Way! I have a super awesome post for you today. This is on my top list of favorite projects I have ever done. So be warned its pretty awesome!
Remember this amazing Headboard that had a debut on Studio 5, HERE and HERE and on my anthropologie bedding post last month, well it is finally time to show you how we made it. I am so excited, to share. I have gotten emails, messages, and comments asking how I made this and even if I would consider making them for others. Cool right?! But the best part is it was so easy and you could totally make your own and finish it in just a weekend. Not to mention it only cost me about $25 to make by using things we already had, my resources and sales!!!

{Supplies Needed}

-2 pallets {Free}
-5 4foot 2by4s {I got mine in the sale section of home depot for only $1 a piece}
-Crowbar
-Hammer
-Nail gun and compressor / or just hammer and finishing nails {borrowed}
-Stain {Early American}
-White paint
-Water
-Paint brush
-Rag
-Sander and Sandpaper
-Hangman system {large holds up to 200lbs}- $13
{How we made it}

-Very first step after you get all your supplies is to pry apart your pallets. This is where you get the hubby's muscles to help you out. I did try to do a few and was able to do it but took me way longer than my hunk of a man. So thankful he is willing help me with my crazy projects. Here is were you are going to use your crowbar and hammer. Slide the bar between the nail and wood and hit it with the hammer until the nail come loose, then pull out all the nails. Then I left the nail holes because I loved the shabby chic look it gave. So much character in this piece! ahhh I just love it. Continue to pry the pallets apart until you have all the wood you need.

-Once I had all the wood pieces I needed {I used a total of 22 different sizes of pallets} I laid them out on the ground exactly how I wanted them to be up on the wall. I pieced them together randomly with no rhyme of reason and left the edges raw and jagged. Again I love the character of it. When I laid it out it measured at 88 inches wide by 43 inches tall. which we are putting behind our queen sized bed, but this is big enough to also go behind a king.

-Now it is time to attach all the wood together. Originally we were going to use wood glue and clamps to attach all the wood together but that was just way too much work, then we thought we could glue it all to the back of a big piece of wood the same size of the pallets, but that would cost more than we wanted. So then we thought of the above plan to use five 2by4s going vertically this would keep all the wood tight together and was super strong and cheap. We were going to use three 2X4s but then the middle one wasn't covering all the cracks, so then we cut up the third piece into smaller pieces {See below} and covered each crack so it was super strong and indestructible.

Perfect plan ended up working and for sure the thriftiest way to go.
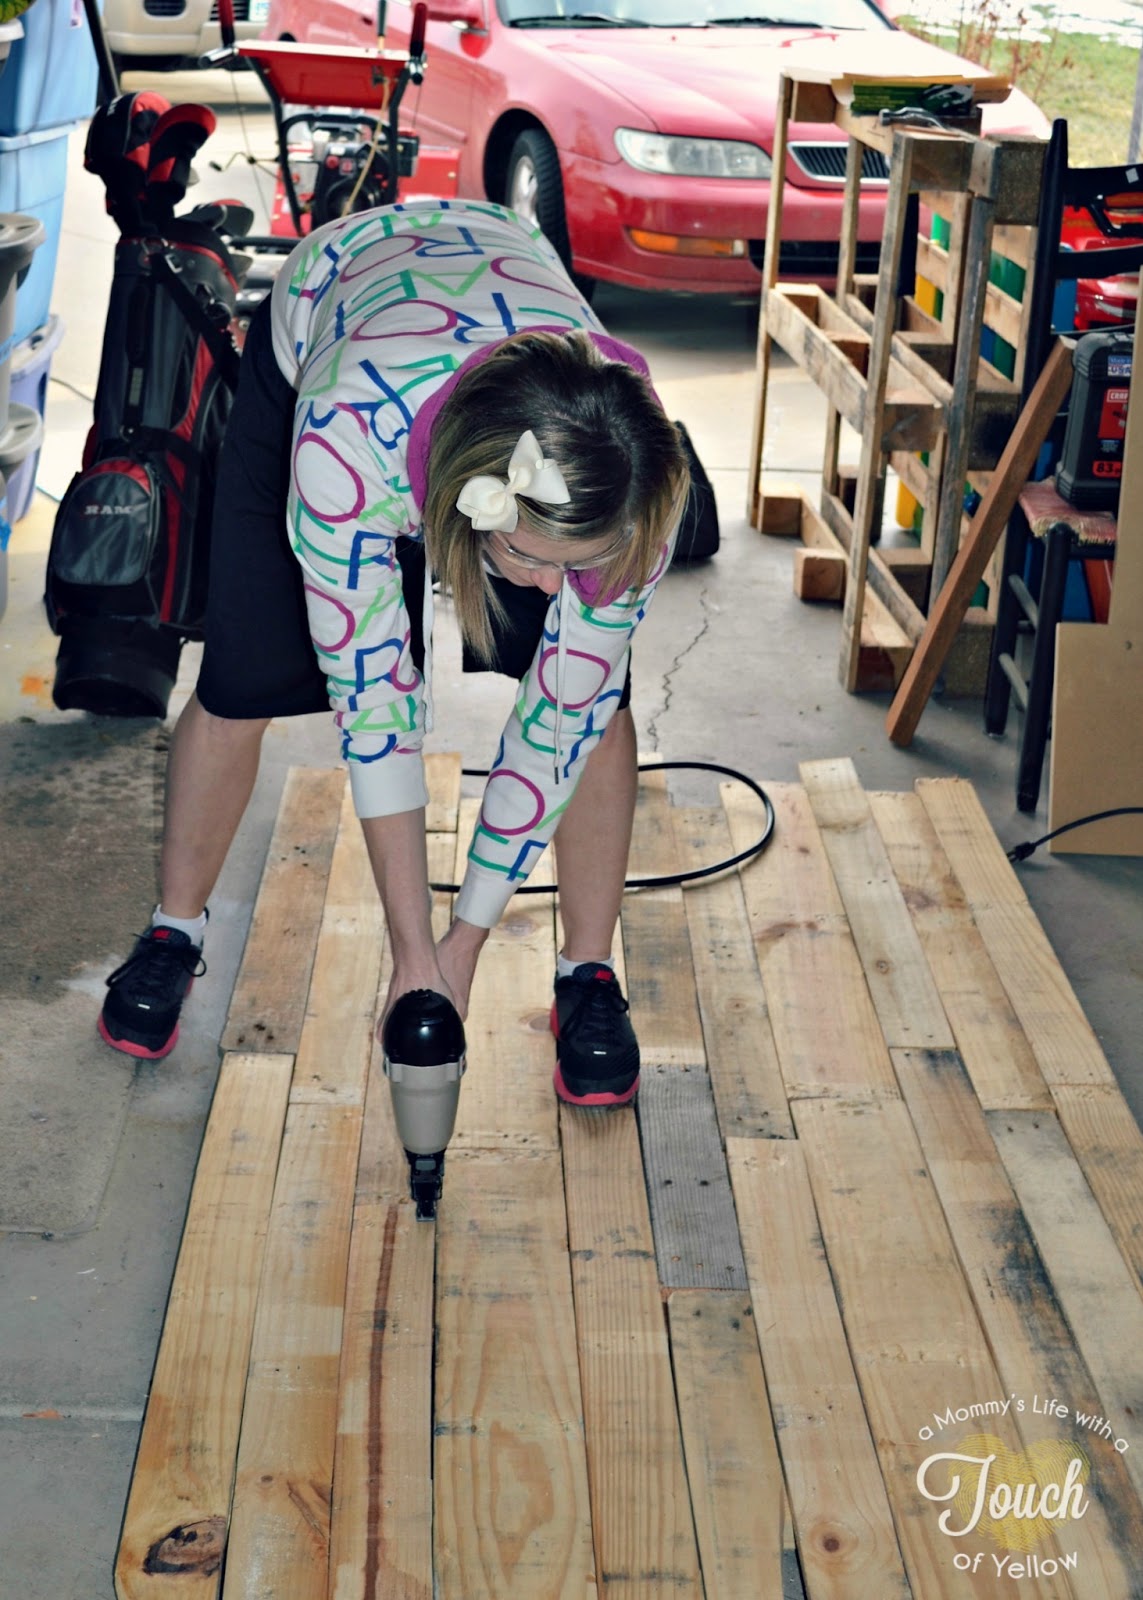
Then we just used the nail gun and compressor to attach the 2by4s to the pallets. You could also do this with a hammer and finishing nails. We had access to the compressor and it made it so much faster so if you can borrow one.

So here is the view of what the back should look like

Bam! Simple as that you have your headboard all put together. The hardest part is done. Now all that is left is beautifying it.Next you are going to take your sander and go over the whole thing with 220 grit sandpaper and then go over it again with 100 grit. This will make it super smooth, and all ready for painting.

-Next step is to stain this bad boy. This went so fast. Just brush it on all your boards, let it sit for about 15 minutes then take a rag and wipe off the access. I did the boards randomly different shades, using more stain on some and less on others. Again this was super random no pattern to it. Then you are just going to let your stain dry for at least an hour before you go onto the next step.


Now onto my favorite part, that I feel like really gave it the look I am totally in LOVE with, the whitewash technique. To read my full tutorial on how to white wash go to my post HERE. But here is a quick rundown. First make your whitewash by using one part paint to 2 parts water. Then you are going to brush it on, one board at a time, with a paint brush and then take a rag and spread it around on each individual pallet board. Again I wanted each board to have its own look so I did 1 coat of whitewash on some, 2 coats on some, 3 coats on some and even 4 coats on a few. Again I did this random so it looked antiqued.


Let your whitewash dry over night and you are done!!!! All you have left it hanging it up above your bed!!! Ekk. I was so excited and so in love at this point.

Why yes I even kissed it when we were done. I love when project work out, and when they are even more amazing then what you could have imagined.


-Ok, Here is the very last step, installing your hangman system to the back of the headboard. Seriously these are the best and the way to go for all your heavy wall projects. First we added a 2by4 to the top of the headboard, because the screws are too long and would go through the headboard without this extra piece. Installing is as simple as drilling the wall piece to the wall and the other piece to the project. Seriously it is that easy.


Then hang it up!!!! Sit back and admire your work. I sure did. It really was easy and we got it done in a weekend.


Our room makeover is slowly coming together. I just have a few more projects to finish before the big reveal and tour of the whole room.


Pin it!

Linked up HERE
Lil Luna, Sugar and Dots, Southern Lovely, Rolled up Pretty,
Chic on a Shoestring Decorating,
Nap time Crafters
Chic on a Shoestring Decorating,
Nap time Crafters
Check out More of our master bedroom projects


Thank you for your support, for reading and following
Make sure to follow along on my other social media sites
I would love to follow back
{Links below}


