
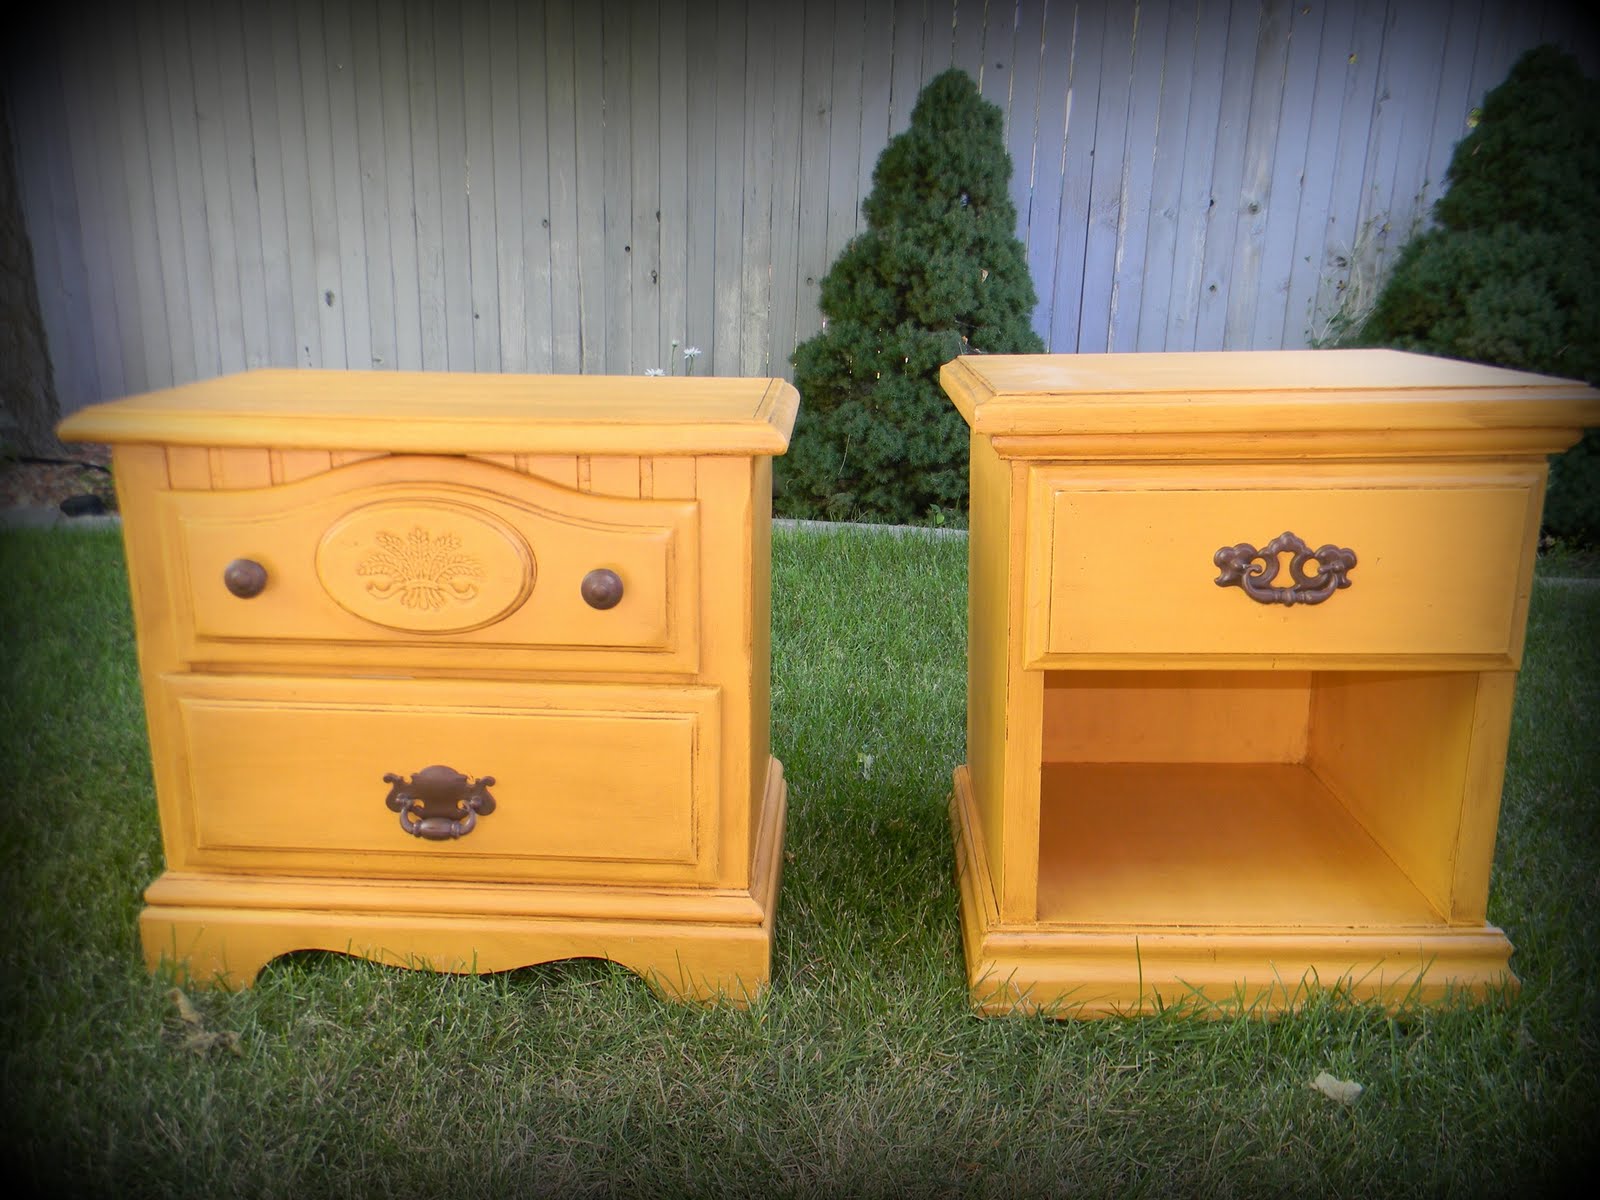
I was so so excited to get my bedroom redo going so I started with the nightstands

I got the one on the left at the DI for $10
and the one on the right for Free from my in laws
Sweet deal right?!

The first step was to pick the right color
And we decided on YELLOW
after seeing my sister in laws
from All Things Thrifty

I asked her what color she used and got the same one
I found it at Michaels
she spray painted hers but since I am more comfortable
rolling furniture I got paint to match the spray paint
Did you know they can do that
All I did is bring the spray paint to Home depot
and they scanned the lid and the paint matched perfect
Exactly what I wanted
So If you ever find a spray paint color you love but want it on a wall or something
you are going to roll you can get it matched!

First step Is to sand
We have an electric sander so it made that process go a lot
faster
It had a finish on it and had some carvings in the one from the DI
so I wanted to sand those out

Next you want to wash all of the dust off
with a wet rag and let it dry and then
dust it off with a dry rag after

Next you want to Prime

I use kilz because it is the BEST
This step is so important


After the Prime dried completely
It was time to start paintin
This part was so exciting for me

You can spray paint them or roll them
I rolled them to get a more even look
I just used a 4 inch sponge roller
and the paint that matched the krylon Bauhaus Gold spray paint

It is seriously the PERFECT yellow
Seriously isn't that pretty?!

I did two coats letting it dry completely between each coat

Next I glazed them
I really wanted the warn rustic shabby chic look
So I got the Behr glaze and had Home Depot
tint it a coffee brown color
and it was exactly what I wanted
I will do a post on glazing soon so make sure to check back

This next step is optional
but since out nightstands will get a lot of use out of them
I decided I wanted to put a clear protective coat on them
I used the Minwax Polycrylic water based spray paint
I did 2 coats letting it dry completing between each coat
Lastly I painted the hardware
I just used the krylon leather brown spray paint
did a few coats and then sprayed a coat of the poly on them
and screwed them back in place

arent's they so pretty?
and I love how the glaze makes everything pop!

Seriously this YELLOW is to die for
And I love to wake up every morning with this beauty on my side :)
Hubby likes them too

Oh and don't forget inside the drawers!
This is like seriously my favorite part
Go here to see the tutorial :)

The one on the left is on hubby's side
because he needs drawers to hide is stuff haha
and the one on the right is on my side
and I put a basket and some books on the bottom shelf
Lets take another look at the before and after shall we
:)

Before

After
This nightstand redo is linked here and
here


Feel free to email me or leave a comment with any questions
I will get back to you all
Cuz I LOVE you :)
Next project is painting the dressers white!
Thank you for your support and for reading


love the yellow, they are so fun now!!
ReplyDeleteLove the yellow! Good to know you can get spray paint color matched. I need to keep that in mind!
ReplyDeleteI always wondered how accurate the paint scanners were... good to know that they work great. These turned out awesome!
ReplyDeleteLOVE them! I've been planning to paint our night stands yellow and doing a glaze too! :D
ReplyDeleteAbsolutely freakin' GORGEOUS!! I'd NEVER have thought of this yellow, but with the glaze, it's FABULOUS!!! I just bought a beautiful, small antique desk, and I think I'll do it...hmmm...YELLOW!!! Thanks SO MUCH for your inspiration!!
ReplyDeleteThe yellow is such a fun color and I really like how you covered the inside of the drawers! That is so fun and cheerful! I have a party going on over at my blog if you want to join! I'd love to have you! Check it out under the "Stache Party" page on my blog: mylilpumpkinpatch.blogspot.com
ReplyDeleteOh wow, this turned out amazing! I am so impressed by your glazing skills! I have yet to try glazing because I am kind of intimidated by it. You did a fantastic job, seriously!
ReplyDeleteThis looks awesome!!! I totally want to try this!
ReplyDeleteOh my gosh I LOVE it. It turned out GREAT!
ReplyDeleteGorgeous yellow! I love to glaze too and it really amazes me how it makes such a difference. I just bought a glaze from HD for $2.50. It was sitting in their mistake pile.
ReplyDeleteI am so glad you let us know about the paint thing. I have a HUGE dresser I want to paint.. the drawers have a ton of little details that I knew I had to spray paint or it would take FOREVER. But spray painting the top and sides really freaked me out - I am will totally use this tip!!!
ReplyDeleteDarling! I love the yellow too! I just don't have anywhere I'd be able to put yellow....but secretly would love to! Sweet hubby!
ReplyDeleteBecky B.
www.organizingmadefun.com
Organizing Made Fun
Gorgeous! That yellow is so pretty and bright. Looks like sunshine! Great job! Love the glaze on it too.
ReplyDeleteFound you over at Hoos Got Talent! I love this!! I can't wait to see the glaze post because I'm totally interested in doing this for my turquoise and yellow living room that is being built RIGHT NOW!!! Great job!
ReplyDeletewww.mrsvolnoff.blogspot.com
They turned out so pretty. I love the color and can't wait to see your bedroom all finished. You're doing a great job.
ReplyDeleteNow that is a seriously fun colour and great makeovers. Love the drawer lining.
ReplyDeleteThese look outstanding after their makeover...hop over and show them off at my NTT party.
ReplyDeleteBlessings,
Linda
I’m having an Annie Sloan Chalk Paint Giveaway…hop over and enter…ends at midnight 8/7.
Wow that is bright! Look well done. Can't wait to see how they work in your bedroom.
ReplyDeleteI must say, thank you for have the Name/URL or Anonymous tab so I can comment on our blog. Many bloggers do not have all these options and I can not comment on theirs.
ReplyDeleteI love the bright, cheery color. I want pics of it in the room now :)
ReplyDeleteColey @
www.whatyoumakeit-coley.blogspot.com
Brilliant!!!
ReplyDeleteThese are great!! I love the color and the tutorial is fabulous too. I am going to have to check out your lining of the drawers tutorial too. The inside is amazing!!!
ReplyDeleteThanks so much for linking up to Strictly Homemade Tuesday. I hope to see you this Tuesday. Cheers!
What a wonderful transformation! You have really brought new life to these nightstands. And your tutorial is one of the best I have ever seen! I have been battling chalk paint and dark wax on a dining room table for my son's first house. Just bought some black semi gloss Behr today to start all over and was wondering about the spray Polycrylic. Thanks so much for sharing - I have learned so much and am bookmarking this!
ReplyDelete